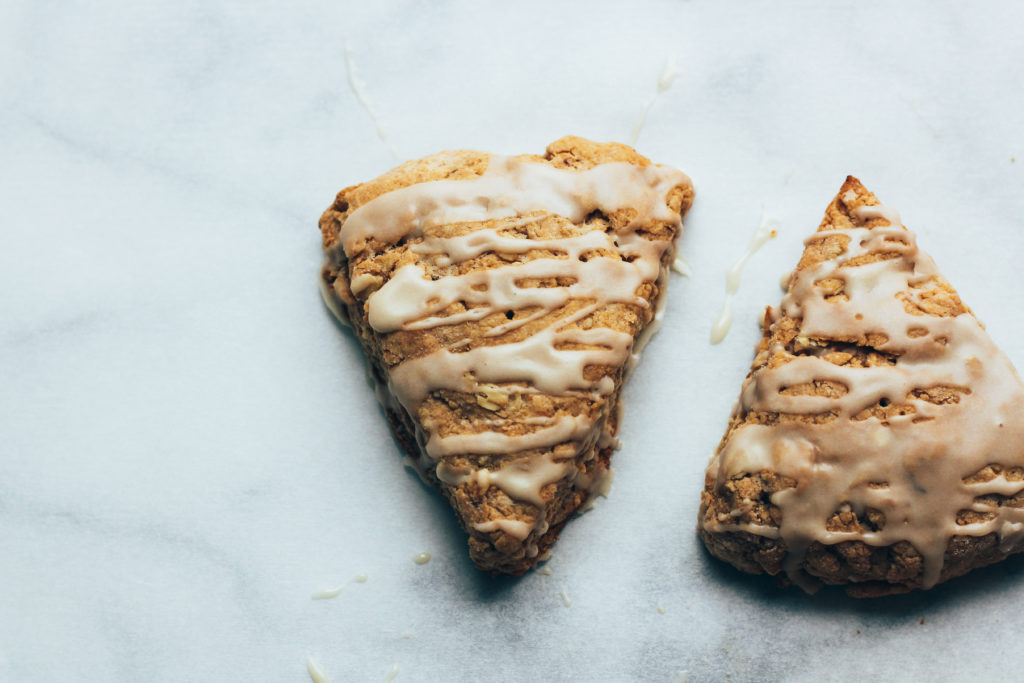
Whole-Wheat Maple-Oat Scones with Coffee-Maple Glaze
If you’ve never made scones before, let me assure you that they are surprisingly simple to make; so simple, in fact, that they are a great baking project to do with your kids. Just keep in mind these two keys to achieving light and tender scones:
1. Keep your cold ingredients (butter, yogurt, cream) as cold as possible, especially the butter, because when the cold butter meets the hot oven, that’s when the scone magic happens: As the butter melts, it creates little pockets of steam that then create flaky layers within the scone.
2. Handle the dough as gently and as little as possible. Don’t overmix or overknead the dough, or you will end up with tough, dry, and/or dense scones.
Like most scones, these taste best the day they are made, fresh and warm from the oven. However, if you want to make them ahead but still maintain their freshness, you can freeze the scones before baking or after baking. To freeze them *before* baking, place the cut scones on a parchment-lined baking sheet and freeze them until firm. Once they’re frozen, place the scones in a plastic resealable freezer bag, press out any air, seal the bag, then return them to the freezer for up to a month. When you want to bake a few—or all—of the scones, take them out of the bag and place them on a parchment-lined baking sheet while the oven is preheating, then bake as directed. They don’t need to be fully thawed before baking, but you’ll probably need to add a few minutes to the baking time. To freeze the scones *after* baking, just bake the scones as directed, cool them completely, then freeze any leftover scones in plastic resealable freezer bags. When you get a scone craving, thaw them at room temperature (keep the scones in the bag to keep the moisture from evaporating and drying out the scones) or—if you’re in more of a hurry—in the microwave. These scones taste best when served warm, so once they’re thawed, I recommend heating them up in a warm oven or in the microwave just before serving. If you plan to glaze the scones, freeze them plain without the glaze, then mix up the glaze and drizzle them after thawing and baking/reheating, just before serving.
One last note: Although I think these scones are incomplete without the coffee-maple glaze, you can certainly omit the glaze if you prefer. If you omit the glaze, I’d recommend brushing the tops of the scones with milk or cream (or half-and-half) and sprinkling them with either maple sugar or coarse-grained turbinado sugar before baking. Or, leave them plain; my kids happily eat them this way. It’s totally your call.
Yield: 12 scones.
Author: Wholesome Family Kitchen
Ingredients
For the Scones:
- -- 1 cup white whole-wheat flour, plus more for forming the scones*
- -- 1 cup whole-wheat pastry flour**
- -- 1 tablespoon baking powder
- -- ½ teaspoon kosher salt
- -- ½ teaspoon cinnamon
- -- ½ cup old-fashioned rolled oats
- -- ½ cup chopped walnuts or pecans (optional)***
- -- ½ cup cold unsalted butter (1 stick/8 tablespoons/4 ounces), cut into small cubes and chilled (I cut up the butter then put it back in the refrigerator until I’m ready to use it.)
- -- 5 tablespoons (1/4 cup + 1 tablespoon) real maple syrup (I like to use Grade A Dark Color, for the most maple flavor, but Grade A Amber Color will also work fine. Read this for more information about the current maple-syrup grades.)
- -- ½ cup plain low-fat yogurt (I like Stonyfield’s organic plain low-fat yogurt. Greek yogurt should also work fine, but you’ll need to add 1 to 2 more tablespoons of milk or cream. I would avoid using nonfat yogurt though, because scones need the fat to bake up tender and not dry.)
- -- 3 tablespoons cream, milk, or half-and-half (I use half-and-half), plus more for brushing the tops (if omitting the glaze)
- -- 1 teaspoon pure vanilla extract
- -- Coarse sugar (e.g., maple sugar or turbinado sugar) for sprinkling on top (optional, if omitting the glaze)
For the Coffee-Maple Glaze:
- -- ¾ cup confectioners’ sugar
- -- 1 tablespoon strong-brewed coffee (decaffeinated, if you prefer), cooled to room temperature
- -- 1 tablespoon salted butter, melted
- -- 1½ teaspoons real maple syrup
- -- 2 teaspoons cream, milk, or half-and-half
Instructions
To make the scones:
- Preheat the oven to 375 degrees F. Line a baking sheet with parchment paper.
- In a medium bowl, whisk together the flours, baking powder, salt, and cinnamon, then stir in the rolled oats. Add the butter to the bowl, and use a pastry cutter (or a fork or two knives) to cut the butter into the dry ingredients until the mixture looks like coarse sand with some larger, pea-sized chunks. (The smaller pieces of butter will tenderize the scones, while the larger ones will create flaky texture. So it’s okay—preferable, in fact—to still have some larger pieces of butter visible; you don’t have to fully incorporate all of the butter here.)
- Add the nuts (if using), and stir gently with a fork or rubber spatula to mix them in.
- In a small bowl or a large glass measuring cup, whisk together the maple syrup, yogurt, cream or milk, and vanilla. Add to the dry ingredients and stir gently yet quickly with a fork or rubber spatula until evenly moistened and a dough just starts to form. Don’t overmix!
- Gently gather the dough into a loose ball with your hands, then divide it into two halves of equal size. (If you have a kitchen scale, it will come in handy here to help ensure the dough is divided evenly.) On a lightly floured work surface, gently pat and press each half of the dough into a circle about 6 inches in diameter and about ½ inch thick. Use a baker’s bench knife or a sharp knife to cut each circle into 6 wedges. (If you are baking these scones on a warm day in a warm kitchen and you find it difficult to keep the butter cold while you are mixing the dough, put the cut scones on the parchment-lined baking sheet and then in your refrigerator—or even the freezer—for 15 to 30 minutes to chill the fat again before baking. This will help ensure that the scones bake up light and tender.)
- Transfer the scones to the parchment-lined baking sheet. If omitting the glaze, brush the tops of the scones with cream or milk (or half-and-half) and sprinkle with coarse sugar; otherwise, leave them plain. Bake until the scones are puffed and light golden brown, about 15 to 20 minutes. (I like to rotate the baking sheet front to back halfway through the baking time, to help ensure even baking.) Transfer the scones to a cooling rack and cool just enough to eat—they are best served warm—or, if glazing, cool a little longer (about 10 to 15 minutes) so the glaze doesn’t melt off the too-warm scones. Enjoy with a hot cup of tea or coffee!
To make the coffee-maple glaze:
- In a small bowl, whisk together the confectioners’ sugar, coffee, melted butter, maple syrup, and cream or milk until smooth. (If the glaze is too thick for your liking, add more cream or milk.) Use a small spoon to drizzle the glaze over the cooled scones. Sprinkle with toasted walnuts or pecans, if desired.
Notes
* If you’ve followed my blog long enough, you probably know that white whole-wheat flour is my favorite flour to use when baking more-nutritious baked goods without sacrificing flavor or texture. Don’t be misled by its name; white whole-wheat flour is not the same as white flour. White whole wheat has all the fiber and nutrition of traditional “red” whole wheat, but it is lighter in color and milder in flavor. King Arthur Flour makes a white whole-wheat flour that is pretty widely available these days. If you’re curious, you can learn more about white whole wheat here.
** Whole-wheat pastry flour is another flour I reach for when looking to bump up the nutrition and fiber content of muffins and other pastries without turning them into heavy, dense baked goods. Finely milled from lower-protein “soft” wheat, whole-wheat pastry flour has a finer, softer texture than regular whole-wheat flour, which is milled from “hard” red wheat.
If you have trouble finding white whole-wheat flour and/or whole-wheat pastry flour, you can certainly substitute all-purpose flour for either or both of these flours in this recipe and still turn out delicious scones.
*** I usually omit the nuts because my kids are not fans, but if you want to more closely replicate those Starbucks scones, feel free to add them. You can also sprinkle some nuts on top of some or all of the scones after drizzling them with the glaze, depending on your family members’ levels of nut acceptance/aversion. If you do choose to add the nuts, I’d recommend toasting them first (in a 350-degree oven for about 5 to 8 minutes, depending on their size, or in a stove-top skillet over medium heat for about 3 to 5 minutes) to bring out their flavor.
Sources consulted when developing this scone recipe: King Arthur Flour Whole Grain Baking and Megan Gordon’s whole-wheat maple walnut scone recipe. Glaze recipe inspired by this one.
Recipe by Wholesome Family Kitchen at https://www.wholesomefamilykitchen.com/recipe-maple-oat-scones-with-coffee-maple-glaze/