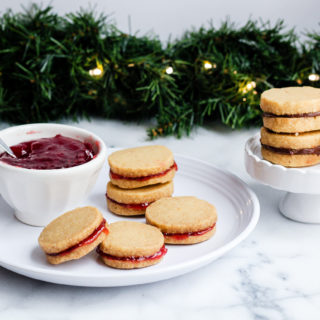
Brown-Butter Shortbread Cookies with Jam (or Chocolate-Hazelnut Spread)
Besides their melt-in-your-mouth deliciousness, there are several other reasons why these cookies are one of the stars of my holiday cookie tins each year: They’re nut-free (except for the batch I sandwich with chocolate-hazelnut spread, of course), so they’re safe for teacher gifts at my sons’ nut-safe schools. They have a short and simple ingredient list, so chances are I don’t need to make a special trip to the grocery store to make them. The dough comes together quickly and is easily mixed by hand—you don’t even need to drag out your stand mixer! And because they keep well in an airtight container for 2 weeks and they only improve with age, they can be made in advance; in fact, I encourage you to make them at least 2 days in advance, because they will taste even better.
The hardest part about making these cookies—and it’s not so much a difficult task as it is a tricky task that requires close supervision—is browning the butter. The first couple of times I did it, I was distracted and browned the butter to the beyond-salvageable blackened stage, so learn from my mistakes and watch it closely. Celia Barbour’s description of the process of browning the butter in her original recipe is spot on, so I duplicated her instructions below.
The original recipe in Gourmet instructed bakers to form the cookies using a teaspoon; hence, their original name, “Spoon Cookies.” I made the cookies using this method for several years and found it to be a tedious, albeit somewhat meditative, task. But then inspiration arrived (once again) from a Martha Stewart publication: In the December 2012 issue of Martha Stewart Living, I came across a strikingly similar recipe to the spoon cookies (sans the jam filling), but instead of forming each cookie individually with a spoon, Martha’s recipe used a much simpler slice-and-bake technique. I made the cookies that year following Martha’s directions, and I’ve never looked back. The recipe instructions below are a hybrid of Celia Barbour’s recipe and Martha’s recipe, along with my own tweaks from over the years. It’s really the best of both worlds.
Yield: Approximately 44 cookies, to make 22 sandwiched cookies
Author: Wholesome Family Kitchen
Ingredients
- -- 1 cup (2 sticks/16 tablespoons/8 oz.) unsalted butter, cut into pieces
- -- ½ cup natural cane sugar
- -- 2 teaspoons pure vanilla extract
- -- 2 cups unbleached all-purpose flour
- -- ½ teaspoon baking powder
- -- ¼ teaspoon kosher salt
- -- heaping ⅓ cup fruit jam of your choice (and/or chocolate-hazelnut spread) *
Instructions
To make the dough:
- Have a large heat-safe bowl ready (I use a glass bowl) into which to pour the butter when it is browned (to stop the cooking process and prevent further browning). (You will also add the rest of the ingredients to this bowl and mix up the dough in it, so choose one that is large enough.)
- Brown the butter (if you’re new to the task of browning butter, see notes below for more tips and guidance **): Add the butter to a medium-sized heavy saucepan and set over medium heat. Melt the butter and cook, stirring occasionally, until the butter turns golden and smells nutty and flecks on the bottom of the pan turn a rich caramel brown, about 10 to 12 minutes. (Butter will initially foam a bit, then dissipate. A thicker foam will appear and cover the surface just before the butter begins to brown; turn the heat down to low and stir more frequently once this occurs.) Immediately remove the pan from the heat and pour the butter into the large bowl. Let the butter cool to room temperature, about 10 minutes, stirring occasionally.
- Whisk the sugar and vanilla into the butter.
- In a medium bowl, whisk together the flour, baking powder, and salt. Add to the butter mixture and stir until a dough forms. Shape the dough into a ball, then set the ball of dough onto parchment paper. Using your hands, form and roll the dough into a log about 14 inches long and about 1½ inches in diameter. (Dough will be crumbly, but will come together when pressed into a log and chilled.) Wrap the dough log in parchment, and refrigerate until firm, about 1 hour.
To bake the cookies:
- Preheat the oven to 325°F. Line 2 rimmed sheet pans with parchment paper.
- Remove the dough log from the refrigerator and unwrap. Using a sharp knife, slice the dough into approximately ⅜-inch rounds, and transfer them to the parchment-lined pans. The cookies will not spread much, so you can space them about an inch apart on the pans. (If the dough is crumbling too much when you slice it, let it rest at room temperature for a few minutes, then try again. It is a shortbread dough, so it will be somewhat crumbly, but it is easily pressed back together. I’ve found that if the dough is too stiff/cold, it can be a little more difficult to slice. Letting it sit for a little while at room temperature should help though.)
- Bake the cookies until firm, slightly puffed, and just pale golden, about 8 to 12 minutes. (To help ensure that the cookies bake evenly, rotate the pans front to back and top to bottom about halfway through the baking time.) Remove the pans from the oven, and let the cookies cool on the pans for 2 to 3 minutes to set up before carefully transferring them to wire racks to cool completely.
To assemble the cookies:
- While the cookies cool, heat the jam in a small saucepan over low heat until just runny. Pour and press and scrape the jam through a sieve into a small bowl to remove seeds and solids. Cool completely. (I know this step seems fiddly, but it makes it easier to spread a thin layer of jam on the cookies when the jam is smooth and it doesn’t contain a bunch of seeds and other solids hindering its spreadability.)
- Spread the flat side of a cookie with a thin layer of jam. Sandwich with the flat side of a second cookie. Continue with the remaining cookies and jam. Let the assembled cookies stand at room temperature until the jam is set, about 45 minutes. Transfer cookies to an airtight container and wait 2 days (ideally, but who can really wait that long?) before eating to allow the flavors to develop. (The cookies are yummy that first day, but the next day, and 2 days later, they are even better. If you can wait 2 days, your patience will be deliciously rewarded!) Cookies can be stored in an airtight container at room temperature for up to 2 weeks.
Notes
* This is the time to use your favorite, best-quality jam. If you have a homemade jam you love, then definitely use it here. For the past several years, I’ve been using Stonewall Kitchen’s Holiday Jam, a seasonal jam from one of my favorite New England–based food companies. Its festive flavors of cranberry, pear, raspberry, and orange are the perfect complement to these cookies. Stonewall Kitchen also makes a delightful Fig & Ginger jam that is also delicious here. And, if you really want to kick things up this holiday season and make friends for life, then sandwich some of the cookies with a high-quality, all-natural chocolate-hazelnut spread. It’s worth your while to seek out the good stuff here. My local Whole Foods Market carries the Rigoni di Asiago brand, which is smooth, creamy, and addictively decadent. (Rigoni di Asiago also makes a dairy-free chocolate-hazelnut spread, and their organic jams, sweetened with apple juice, are yummy too.) I excitedly purchased a chocolate-hazelnut spread with olive oil (!) at Eataly Boston a few weeks ago, which took the cookies to yet another level this year.
** Here are Celia Barbour’s brown-butter tips from the original recipe in Gourmet (December 2005), which I still find incredibly helpful to read every year when I make these cookies:
“Browning butter is not difficult…. Still, there is a way to do it right. First, the pot shouldn’t be too deep or too broad. If it is too deep, you cannot see through the bubbling butter to the bottom, where the browning takes place. If it is too broad, the butter cooks quickly, and you may wind up with milk solids stuck hard onto the pan. So for one stick, a small saucepan is fine. Four sticks, try a little stockpot.”
“Cut up cold butter and set it over moderate heat. When it is all golden liquid, start stirring as the butter begins to simmer. Next, a froth appears on the top; this soon gathers into little clouds, which then dissipates as the milk proteins separate from the fat, cook, and harden into tiny grains that fall to the bottom of the pan. There they’ll sit, turning brown—first pale caramel (beurre noisette), then tea-leaf (beurre noir), and finally, after about 10 seconds, black (garbage). I always leave the pan on the stove a few beats beyond rosy caramel to give a deeper flavor to the cookies.”
Recipe adapted from Gourmet, December 2005, and Martha Stewart Living, December 2012.
Recipe by Wholesome Family Kitchen at https://www.wholesomefamilykitchen.com/recipe-brown-butter-shortbread-cookies-with-jam/