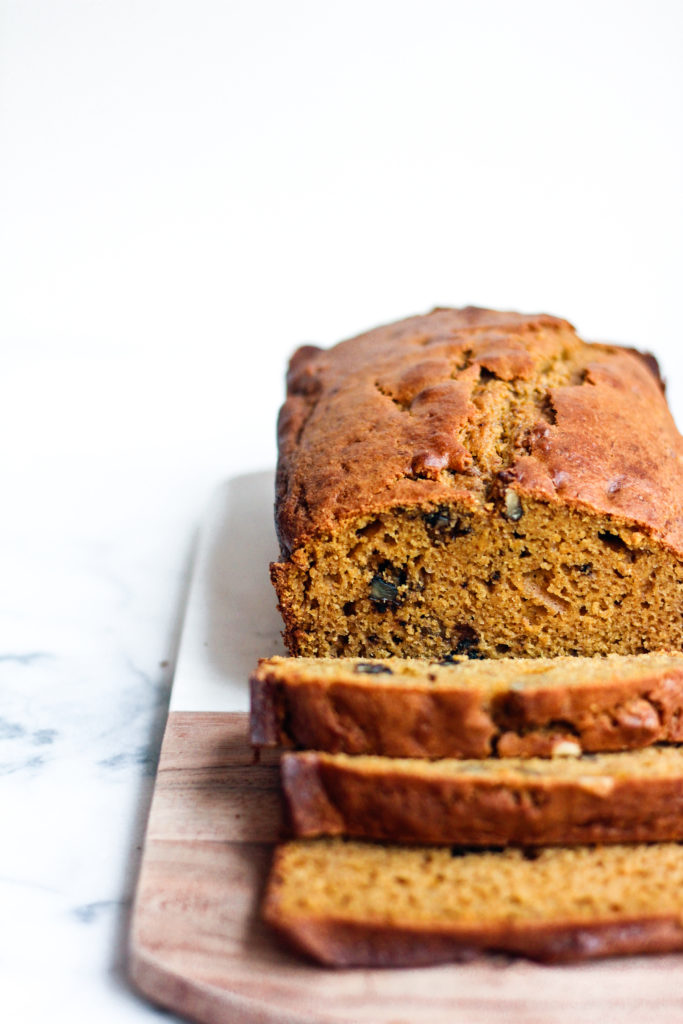
Whole-Wheat Pumpkin Bread
I suppose this is where I’m supposed to tell you that roasting your own pumpkins and making your own pumpkin purée is so easy and that homemade purée tastes so much better than canned pumpkin. Well, I have made my own pumpkin purée only once, and honestly, I didn’t notice enough of a difference for it to be worth the extra effort. Although I am a champion of whole foods, I am not opposed to using canned foods for the sake of convenience if they are minimally processed and contain only a few recognizable ingredients. Canned pumpkin is one of those such foods: It contains just one ingredient—pumpkin!—and you always know what you’re going to get. Homemade pumpkin purée can sometimes be too watery and other times too thick, and this inconsistency can affect the results of your baked goods. So when I make pumpkin bread, I use canned pumpkin. That being said, you can certainly use your own homemade pumpkin purée in this recipe if you prefer. My only caution would be to make sure that its consistency is as close as possible to the canned stuff, so that you yield similar results.
This recipe makes 2 loaves of pumpkin bread, or about 30 muffins, but if you want to make only one loaf, you can certainly halve the ingredient amounts. Keep in mind, however, that the bread and muffins freeze very well.
One more note: I recently discovered that adding espresso powder to the batter makes this pumpkin bread extra delicious. However, I am the only coffee drinker in my house, so it’s a variation I make only when I’m serving the bread and/or muffins to other fellow coffee-lovers (especially those who are fans of pumpkin spice lattes). If you want to give it a try, add 2 tablespoons of instant espresso powder to the dry ingredients. (I’ve also had success with just dividing the prepared batter in half, whisking in 1 tablespoon of espresso powder into half of the batter, then making that batter into muffins just for me!)
Yield: Makes 2 loaves, or 1 loaf + 16 muffins, or about 30 muffins.
Author: Wholesome Family Kitchen
Ingredients
- -- Olive oil or nonstick cooking spray, for coating the pans
- -- 1 cup light-tasting olive oil *
- -- 1¾ cups natural cane sugar
- -- 4 eggs
- -- 1 (15-oz.) can unsweetened pumpkin purée
- -- 1⅓ cups plain yogurt (but not thick Greek yogurt)
- -- 2 teaspoons pure vanilla extract
- -- 3½ cups white whole-wheat flour **
- -- 2 teaspoons baking soda
- -- 2 teaspoons ground cinnamon
- -- ½ teaspoon ground cloves
- -- ½ teaspoon ground nutmeg
- -- ½ teaspoon salt
- -- 1 cup chopped walnuts (or 1½ cups dark chocolate chips, or some combination of the two)
Instructions
- Preheat oven to 350 degrees F. Lightly coat two 9-by-5-inch loaf pans (and/or 2 or 3 standard-size 12-cup muffin pans ***) with olive oil or nonstick cooking spray.
- In a large bowl, whisk together the olive oil and sugar until well combined. Add the eggs one at a time, whisking well after each addition. Add the pumpkin purée, yogurt, and vanilla extract; whisk together until smooth and well blended.
- In another large bowl, whisk together the flour, baking soda, cinnamon, cloves, nutmeg, and salt.
- Add the dry ingredients to the wet ingredients and stir until just combined. (Do not overmix!) Gently stir in the walnuts and/or chocolate chips.
- Divide the batter evenly between the 2 prepared loaf pans, or among the prepared muffin pans. (I like to use a ¼-cup ice-cream scoop for scooping the batter into the muffin pans.)
- Bake the loaves at 350 degrees for 45 to 60 minutes, or until a wooden skewer inserted into the center comes out clean. If the tops of the loaves are browning too quickly before they are baked through, lay a piece of aluminum foil over them. (For muffins, bake at 350 degrees for 15 to 20 minutes, or until a toothpick inserted into the center of one of the muffins in the middle of the pan comes out clean.) Cool in pans for 10 minutes, then turn the loaves (or muffins) out onto wire racks to cool completely before serving or storing.
Notes
To store: Wrap each loaf in plastic wrap and then in aluminum foil, and store in the refrigerator. (I’ve kept mine in the refrigerator for as many as 4 days, but they usually don’t last that long.) Bring to room temperature before serving, or slice and reheat individual slices in a warm oven or in the microwave. The pumpkin bread also freezes well, for up to 3 months: Wrap tightly in plastic wrap and then in aluminum foil, and then, for extra insurance, put inside a plastic resealable freezer bag. The muffins also freeze well stored in plastic resealable freezer bags (no multiple layers of plastic wrap and aluminum foil required).
* I recently discovered California Olive Ranch Mild and Buttery Extra-Virgin Olive Oil, and I have been using it with great success in many of my baking recipes that call for a light-tasting or neutral-flavored oil. It works especially well in this pumpkin bread, lending a buttery flavor without any actual butter. You can certainly use canola oil or another neutral-flavored oil in its place, but if you would like to use olive oil, be sure to use one that doesn’t have strong floral or grassy notes, unless you wouldn’t mind those flavors in your bread.
** White whole-wheat flour is my favorite flour to use when baking more-nutritious quick breads and other baked goods without sacrificing flavor or texture. Don’t be misled by its name; white whole-wheat flour is not the same as white flour. White whole wheat has all the fiber and nutrition of traditional “red” whole wheat, but it is lighter in color and milder in flavor. King Arthur Flour makes a white whole-wheat flour that is pretty widely available these days. (If you’re curious, you can learn more about white whole wheat here. ) If you don’t have white whole-wheat flour on hand, you can certainly substitute all-purpose flour and still turn out a delicious bread! (When I first started tinkering with this recipe, I used 2 cups all-purpose flour and 1½ cups white whole-wheat flour, a combination that works particularly well if you’re trying to slowly introduce more whole grains into your baking—and to your family.
*** If you’re baking the batter only into muffins, the full recipe yields about 30 muffins, so you will need 3 standard-size 12-cup muffin pans. You can start by baking 24 muffins in 2 pans for the first batch, then when those are done, bake the last 6 muffins in a third pan (or in a cooled, cleaned, and dried pan from the first batch of muffins).
Recipe by Wholesome Family Kitchen at https://www.wholesomefamilykitchen.com/recipe-whole-wheat-pumpkin-bread/